welcome back for another step-by-step tutorial on desert bases. I ended up using this scheme for all my Death Guard and Nurgle minis, it is rather quick to do and it gives a very good color contrast.

1. I started by placing the main rocks. Pine bark is probably the best option for that, the shape and the texture matches perfectly the 32mm scale and it costs literally nothing. Just make sure to clean up the pieces with a hard brush in order to remove the dust/dirt and to eliminate weak spots. I also added plastic putty here and there to give more variations to the ground making sort of footsteps or animal tracks.

2. I then covered the whole ground surface with Martian Ironearth (Citadel - texture). This paint is simply fantastic, creating a great crack effect when drying. I tried to keep a fairly thick layer all around with some variations to get different patterns and crack sizes. I found that diluting the paint with one or two drops of water helps a lot without affecting the finish result.

3. After a couple of hours the paint is fully dry and the cracks are well established (tip: if you prefer large cracks you can increase the thickness of the paint layer or simply apply a basecoat of PVA glue before applying the texture). I then added small gravels and sand around the rocks.

4. I used PVA to seal the sand and reinforce the cracks. To do so I first wet the base with isopropanol and then apply the glue with a dropper. The alcohol helps to reduce the surface tension so the glue can easily penetrates the smaller recesses. Another option could be to make your own "sealing" glue mixing 1 part PVA and 3 parts of water and adding few drops of dish soap. There are also other techniques very well explained by the excellent youtuber Paepercuts.

5. It can be very difficult to paint over natural materials such as pine bark. It contains microscopic irregularities and recesses where the paint will never go and the texture itself can be problematic, too soft or too much absorbent. I tried to overcome this issue by applying diluted PVA on the rocks to "laminate" their surfaces.


7. At this point the base was ready for painting. I started with a basecoat of Grey Surface Primer (Vallejo) using an airbrush.


7 . I covered the rest of the base with Sand Yellow (Vallejo) from top and at 45º with the airbrush.


9. The next step is where the fun really start! I tinted the base using washes of Seraphim Sepia (Cidatel) and Agrax Earthshade (Citadel). The darkest tone was applied first on small regions (not more than 1/3 of the total surface) and then I completed the base with the sepia tone. I tried to work fast so that I could wet blend the two tones to get smooth transitions. For the rocks I mixed a bit of Sepia with Nuln Oil (Citadel), just to get a slightly darker color.

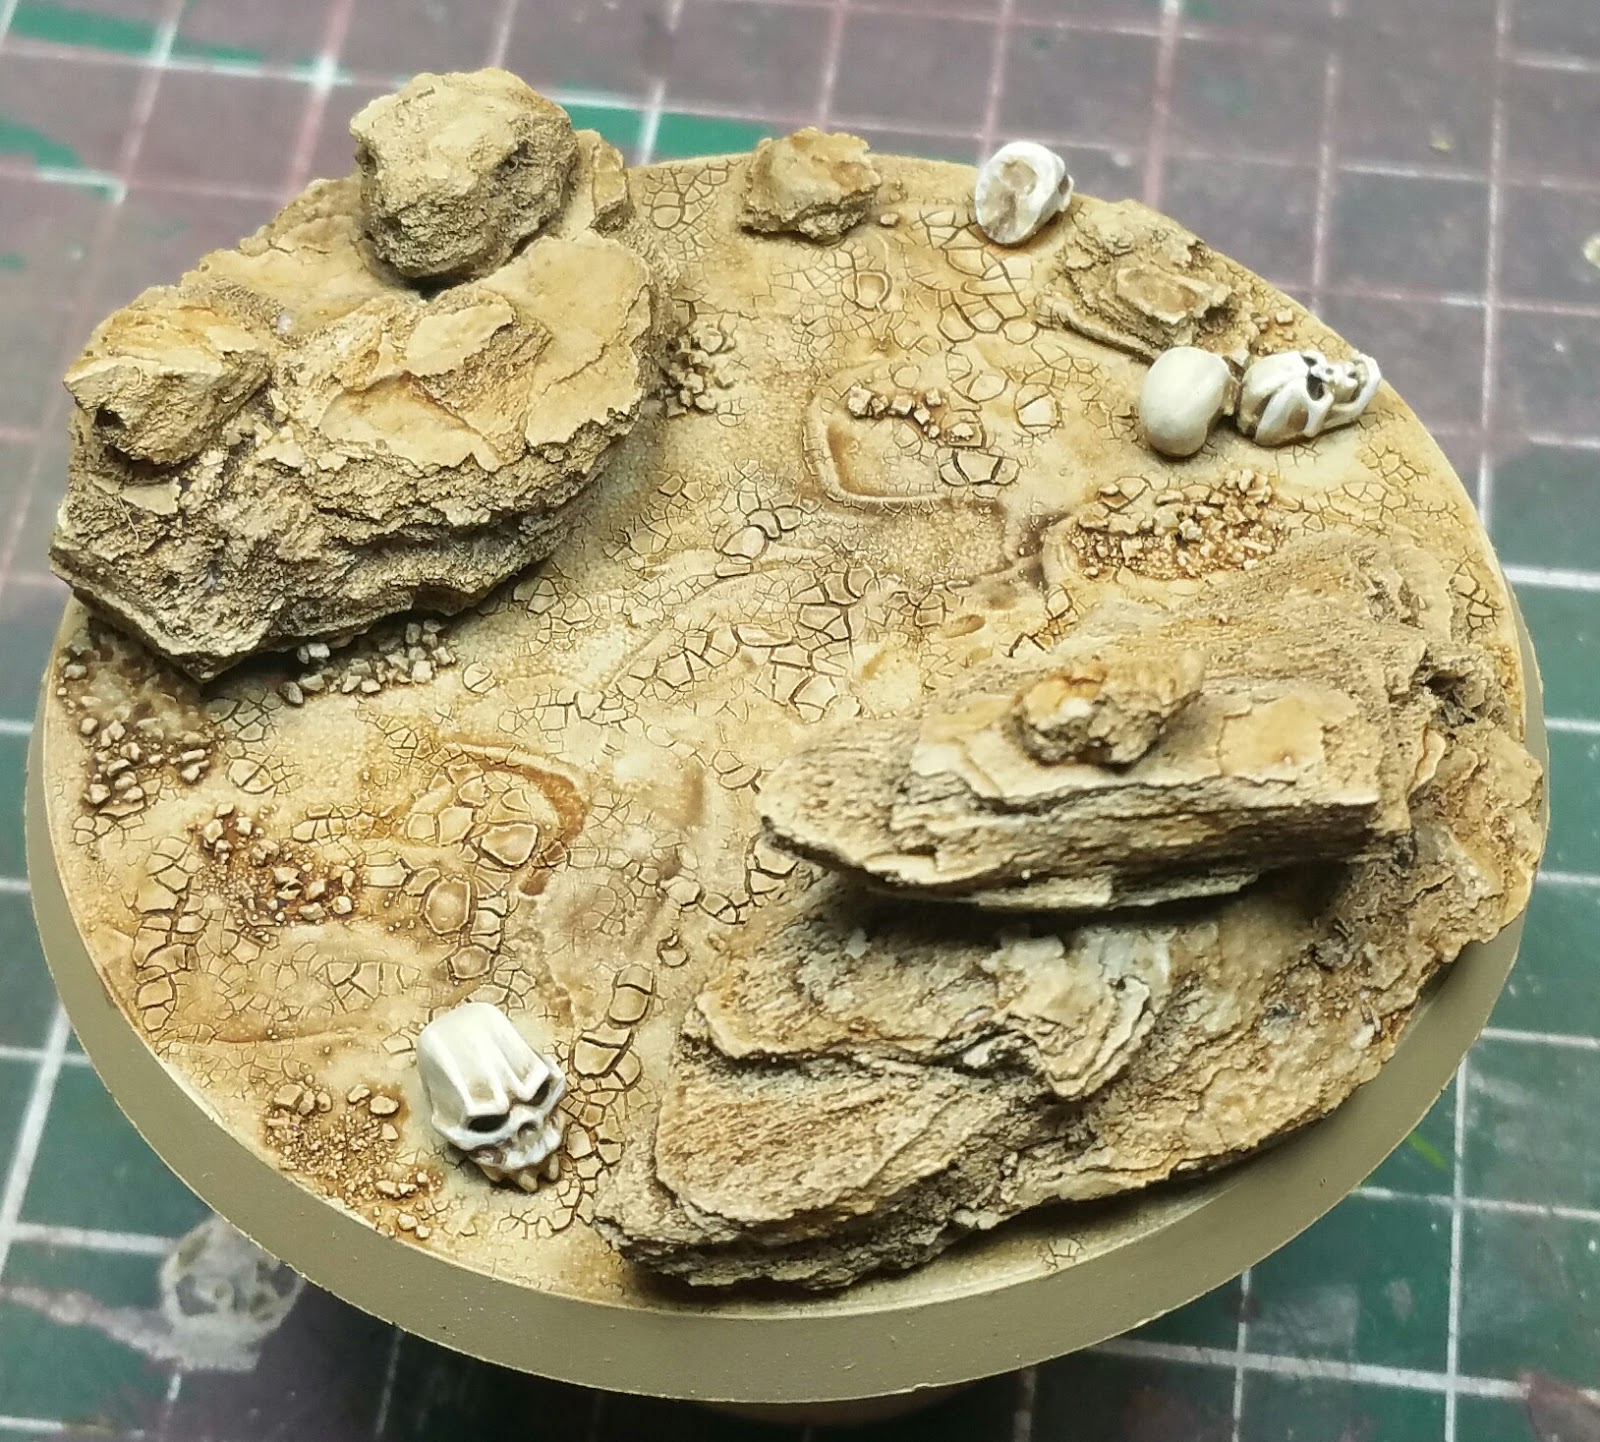

11. At this point the ground components were basically finished to I started painting the details. For the skulls I did a base coat of Bone White (Vallejo) followed with a light wash of Agrax Earthshade (Citadel). I then applied highlights gradually from Bone White to Off White (Vallejo). I also painted the animals using green tone. I always included a bit a Bone White in my mixtures so that the colors would match better with the desert ground.


Alright this is it, the whole process took less than one day, including the drying time. Most of the steps are simple (wash or drybrush) so it's easy to work on many bases in parallel. I managed to start and finish 30 bases in one day at most.

Here is the final result with an actual Death Guard model. The fact that I used same colors on base and model was very important to give the impression that they are in the same environment, under the same light. It helps blending the two pieces together and give a very realistic look.
That's all folks, thanks and see you next time !
Aucun commentaire:
Enregistrer un commentaire