Welcome back for another step-by-step tutorial. This time we will play with Plague Bearers from Games Workshop. I normally like to take the time to paint my minis but in this case I had to do 60 guys in a very short time period for the Fat Of War 3 tournament in March. So I tried to come up with a decent solution to combine speed painting and good looking...


First of all we need to talk about the miniatures. The models proposed by GW are quite fine: a good amount of details, nice poses and enough variations to make all models look unique. The problem is the junction between the different pieces, this is terrible... Despite all my effort in the preparation and the assembly, I couldn't get rid of the deep gaps on the sides of the chest and on the shoulders, the worst being where the neck is supposed to be. Those discontinuities would stand out even more after applying speed painting techniques, ruining all the effort. So I had to spend some time filling the gaps before starting the actual paint job.

1. I used standard yellow Milliput to fill all the gaps. This material is very easy to use and much more flexible than the greenstuff (and cheaper). With the proper sculpting tool it's a matter of 2-3 minutes per model. There are many good tutorials available online so I won't spend too much time on it here, but the one thing I can say is that the effort is totally worth it, I'm now doing this kind of rectification with all my minis.


4. I placed the first highlight using Bone White (Vallejo) airbrushing from the top and with a 45º angle to also get the hidden details.

5. After that I sprayed Athonian Camoshade (Citadel) from the bottom of the model to cover the shadows and part of the lighter regions. Using ink gives a lot more depth to the shadows and helps blending even more the brightest areas.


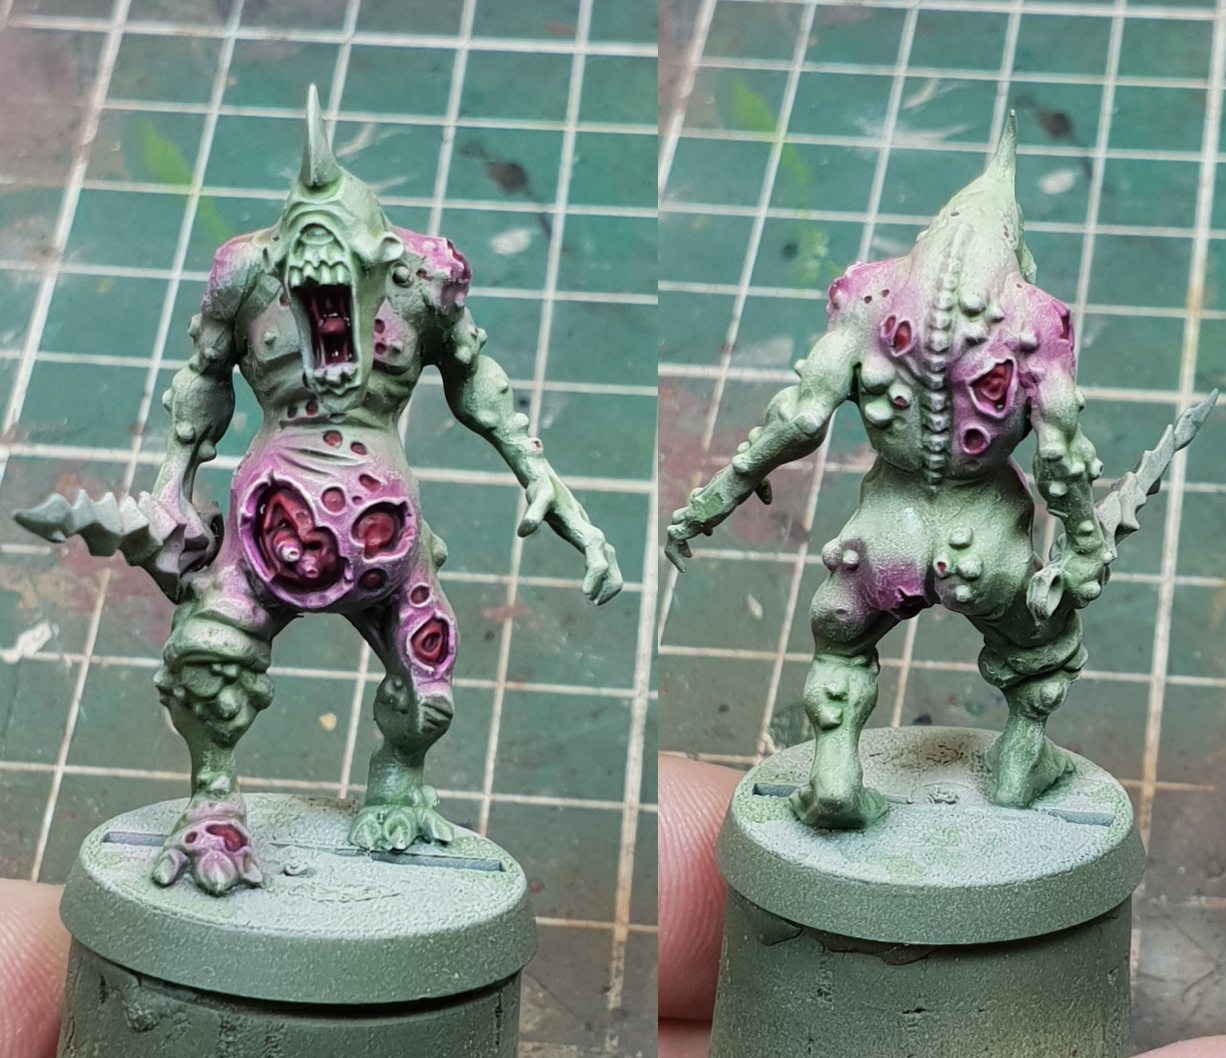
7. I finally used Warlord Purple (Vallejo) around the wounds. For this particular step I used a smaller needle on my airbrush to have a bit more control and precision. I finished with two layers of mat varnish.

8. Then, using a soft brush, I washed the whole model with a 1:1:1 mixture of Athonian Camoshade (Citadel), Biel-Tan Green (Citadel) and Lamian Medium (Citadel). When this layer was completely dry I placed a very light layer of Agrax Earthshade (Citadel) in the deepest recesses and under the skin folds, to give more contrast.

9. For the next step I drybrushed the whole model with Bone White (Vallejo), insisting on the areas around the wounds.


12. I then highlighted the organs inside the wounds with a mixture of Scarlet Red (Vallejo) and Bone White (Vallejo). I also used the latest color on the teeth, the claws and the worms.

13. I worked a bit more on the worms, using a mix of blue and white. Any color would work but I wanted to break to green scheme and bring a small point on interest on the model. I also washed the teeth and the claws with Agrax Earthsahde (Citadel) and a bit of Seraphim Sepia (Citadel).

14. For the final step I used Bone White (Vallejo) for a final highlight on the teeth, the claws and the worms.

Voilà, this is finished! The whole process is very fast, about 20 minutes per model, for a results around tabletop +.

This scheme works very well with my desert base (checkout my tutorial if you are interested).
That's all folks, thanks and see you next time !
Aucun commentaire:
Enregistrer un commentaire